Barcodes make it easier to identify products, track inventory, manage shipments, and connect physical items with digital records. Creating one does not require complicated design skills, but the barcode needs the right data, format, dimensions, and printing settings to remain readable.
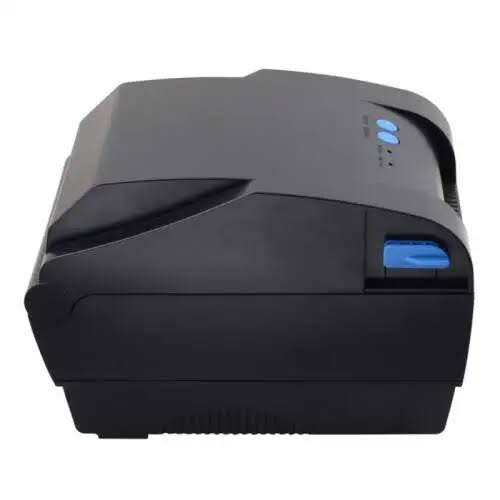
An Xprinter barcode printer can print barcode labels once the barcode has been created through compatible software. The printer handles the physical printing, while your computer, inventory system, POS software, or label-design application typically generates the barcode and sends the print instructions.
What Do You Need to Create a Barcode?
Before creating your first barcode label, prepare the basic information and equipment.
You will generally need:
- A barcode printer
- Compatible label media
- A computer or supported device
- Barcode or label-design software
- Product, inventory, or tracking information
- The appropriate printer driver
The software you choose depends on the type of barcode and the system where you plan to use it.
Choose the Right Barcode Format
Different barcode formats serve different purposes. Some work well for retail products, while others suit logistics, inventory, or internal tracking.
Common examples include:
- UPC and EAN for retail products
- Code 128 for inventory and logistics
- Code 39 for identification and industrial applications
- QR codes for two-dimensional information
Do not choose a format based only on appearance. Check which barcode type your scanner, inventory system, or business process supports.
Enter the Barcode Information
The next step involves entering the information you want the barcode to represent.
For a product label, this might include a product number or SKU. A shipping application may use a tracking number, while an inventory system may assign its own internal identification code.
Enter the information carefully. A barcode represents the data you provide, so a typing error can result in the wrong code even when the printed label looks perfect.
Create the Barcode in Your Software
Open your label-design or business software and add a barcode element to your label layout.
Select the appropriate barcode format and enter the relevant data. The software should generate the visual barcode automatically.
You can usually adjust the barcode’s size and position. Keep enough clear space around the code so scanners can distinguish it from nearby text or graphics.
Design the Rest of the Label
A barcode does not have to stand alone. You can add useful information around it, such as the product name, SKU, price, or description.
Keep the layout simple. Small labels do not provide much room, and overcrowding can make both the barcode and human-readable information harder to use.
Place the barcode on a reasonably flat area of the label and avoid putting it too close to edges, folds, or seams.
Select the Correct Label Size
Measure the label before setting up your design.
The printer needs to support the selected media dimensions, and the barcode needs enough space to print at a readable size. A barcode that becomes too small may cause scanning problems.
Set the label width and height in your software so they match the physical media.
Connect the Printer
Connect the printer to your computer or supported device using the available connection method.
Depending on the model, this may include USB, Ethernet, Wi-Fi, or Bluetooth. Install the appropriate printer driver if necessary.
After connecting the printer, select it as the output device in your label software.
Configure Print Settings
Before printing, review the printer settings.
Pay particular attention to:
- Label dimensions
- Print orientation
- Print resolution
- Print speed
- Print darkness
- Media type
The available options depend on the printer model. Use settings appropriate for your label material and barcode design rather than automatically choosing the highest speed or darkness.
Print a Test Barcode
Do not begin with a large batch. Print one test label first.
Inspect the barcode and make sure all bars, spaces, or code elements appear complete. Also check that the label alignment matches the physical media.
A visual inspection provides useful information, but it should not replace an actual scanning test.
Scan the Printed Barcode
Use the scanner that will normally read your labels to test the printed code.
Try scanning from the normal distance and angle used in your workflow. If the scanner reads the code consistently, the basic setup works as expected.
If it does not scan, check the barcode size, print quality, contrast, quiet zones, and label material.
Troubleshoot Common Barcode Problems
Barcode Looks Faded
Check the print darkness, print speed, media compatibility, and print head condition. Cleaning the print head according to the manufacturer’s instructions may also help.
Barcode Looks Too Small
Return to the label-design software and increase the barcode size if the label provides enough space.
Do not enlarge it beyond the available printable area. The complete code and its required surrounding space need to remain on the label.
Scanner Cannot Read the Barcode
Check the barcode format and make sure the scanner supports it. Then inspect the printed code for missing lines, distortion, poor contrast, or insufficient clear space.
Barcode Prints Off the Label
Verify the label dimensions and printer settings. Incorrect margins, orientation, or media calibration can shift the barcode from its intended position.
Print Multiple Barcode Labels
Once the test label works correctly, you can print a batch.
For products with different codes, your software may allow you to import information from a spreadsheet, database, or inventory system. This can save time compared with creating every barcode manually.
Before starting a large batch, confirm that the data matches the correct products.
Keep Barcode Labels Readable
Printing the barcode correctly is only part of the process. The finished label also needs protection from conditions that could damage the printed information.
Consider the environment where the label will remain. Moisture, heat, sunlight, abrasion, and unsuitable adhesive can affect label performance.
Choose the label material and printing method according to the expected conditions.
Also, explore Common Mistakes Businesses Make When Choosing a Receipt Printer Supplier
Final Thoughts
Creating and printing a barcode involves several steps, from selecting the correct barcode format and entering accurate data to designing the label, configuring the printer, and testing the finished code.
The most important step comes before large-scale printing. Always scan a test label using the equipment and workflow you plan to use. This confirms that the barcode works in practice rather than simply looking correct on the printed label.